Understanding Your Ring Floodlight Cam
Getting Acquainted with Your Ring Floodlight Cam
The Ring Floodlight Cam is a versatile security device designed to enhance the safety of your home. With its combination of high-quality video, motion detection, and powerful floodlights, it offers a comprehensive solution for monitoring your property. Understanding the components and features of your floodlight cam is crucial before you embark on the installation process.
At its core, the Ring Floodlight Cam integrates a camera with excellent picture quality and night vision capabilities, ensuring you can keep an eye on your surroundings day and night. The motion zones can be customized to focus on specific areas, minimizing false alerts and enhancing security.
The installation process involves connecting wires to a junction box, which may require some basic electrical knowledge. You will need to identify the ground wire, white wire, and hot wire to ensure a proper connection. The mounting bracket plays a crucial role in securing the device, so make sure you have all the necessary components ready.
Once installed, the floodlight cam connects to the Ring app, allowing you to monitor and control your security system remotely. This app is essential for setting up motion zones, adjusting settings, and receiving alerts. It's a great tool for anyone looking to enhance their home security with a smart solution.
For more insights into the power requirements of your Ring devices, you might find this resource helpful.
Gathering the Necessary Tools and Materials
Tools and Materials You Need
Before you dive into the installation process of your Ring Floodlight Cam, it's crucial to gather all the necessary tools and materials. Having everything on hand will make the process smoother and more efficient. Here's what you'll need:
- Ring Floodlight Cam: Ensure you have the device ready for installation.
- Mounting Bracket: This will help secure the floodlight cam to the wall.
- Junction Box: Required for housing the electrical connections.
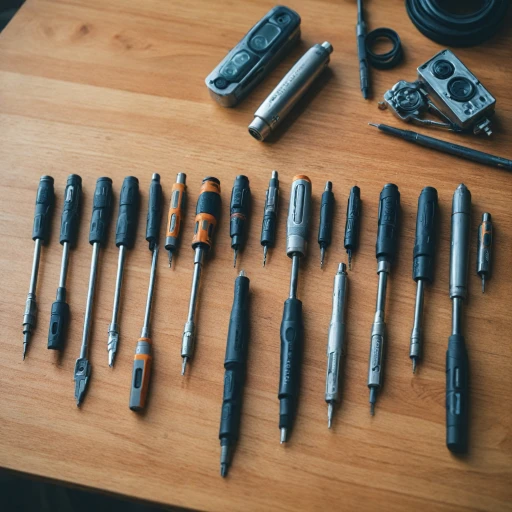
- Phillips Head Screwdriver: Essential for securing screws during the install.
- Drill: To create holes for the mounting bracket if needed.
- Wire Strippers: Useful for preparing wires for connection.
- Electrical Tape: To secure wire connections and ensure safety.
- Voltage Tester: To confirm the power is off before you start working with wires.
- Ladder: Depending on the height of the installation location.
Understanding Your Wiring
When installing the Ring Floodlight Cam, understanding your home's wiring is essential. Typically, you'll be dealing with three types of wires:
- Hot Wire: Usually black or red, this wire carries the current.
- White Wire: This is the neutral wire and completes the circuit.
- Ground Wire: Often green or bare, it provides a safe path for electricity.
Ensure that you have identified these wires correctly before proceeding with the installation. This step is critical for both the functionality and safety of your floodlight camera.
Preparing Your Space
Before you start the actual installation, prepare the area where the floodlight camera will be mounted. Make sure the junction box is securely installed and that the wires are easily accessible. This preparation will make it easier to connect the wires and mount the device securely.
For more detailed guidance on understanding the sound of your Ring doorbell and other nuances, check out this comprehensive guide.
Preparing for Installation
Preparing for a Seamless Installation
Installing the Ring Floodlight Cam requires careful preparation to ensure a smooth setup process. Before you jump into the installation itself, being prepared with the right tools and understanding your environment can greatly enhance the outcome.- Understand Your Electrical System: Familiarize yourself with the existing electrical setup where you plan to install the floodlight camera. Identifying the location of the junction box, which houses the necessary wiring for connecting your device, is crucial. Make sure to turn off power at the circuit breaker to ensure safety during installation.
- Gather Essential Tools: Collect tools such as a screwdriver, drill, wire stripper, and your mounting bracket. These tools will assist in securely attaching the Ring camera to your chosen location. Additionally, having a ladder ready can simplify mounting at higher points on your exterior.
- Assess Your Mounting Location: Consider the optimal placement that covers key areas of your property. Bear in mind the device's motion zones and picture quality features, such as night vision, to optimize security coverage. A great location could have an unobstructed view and convenient access to the junction box for wiring.
- Plan for Wire Connections: You'll need to connect wires meticulously. This includes securing the ground wire, as well as identifying and connecting the hot wire and white wire from the junction box. This careful preparation is crucial for the wiring step.
Step-by-Step Installation Guide
Step-by-step guide to mounting and wiring your floodlight
To ensure your Ring Floodlight Cam is mounted securely, start by attaching the mounting bracket to the junction box on your exterior wall. This will involve using the screws provided with your device. Remember to align the bracket properly to accommodate your cam. Next, begin the wiring process. Connect the ground wire (usually green or bare copper) from your floodlight camera to the ground wire in the junction box. Continue by attaching the white wire from the floodlight cam to the white (neutral) wire in the junction box. Following this, connect the black (hot) wire from the Ring Floodlight to the black wire in the junction box. Once all wires are connected, make sure they are secured with wire nuts to ensure safety. As you work with the wires, ensure there’s no exposed copper, which could lead to electrical issues. After the wiring is complete, gently push the wired connections back into the junction box, and secure the floodlight cam onto the mounting bracket. This step completes the physical installation of your floodlight cam. Referring to earlier guidance will help as you ensure a proper setup and alignment of your security device. Proper installation guarantees great picture quality and effective monitoring of motion zones.Connecting to the Ring App
Setting Up Your Floodlight Cam with the Ring App
To get the most out of your Ring Floodlight Cam, connecting it to the Ring app is essential. This connection enables you to control settings, receive security alerts, and manage video footage directly from your device. Follow these steps to establish a seamless link between your floodlight camera and app:- Download the Ring App: Available on both iOS and Android platforms, ensure you have the latest version of the Ring app downloaded and installed on your smartphone or tablet.
- Create or Log in to Your Account: If you're new to Ring, set up an account with your email and a secure password. Existing users can simply log in using their credentials.
- Prepare Your Floodlight Cam: Ensure your floodlight cam is powered on and ready to pair. You can verify this by checking the LED status light, which should indicate it's in setup mode.
- Add Device in the App: Use the app to add a new device. Select the option corresponding to the type of Ring device you're installing; in this case, a 'floodlight cam'.
- Connect to Wi-Fi: The application will prompt you to connect the floodlight camera to your home Wi-Fi. Choose the preferred network and enter the network password ensuring a stable connection.
- Adjust Settings: Customize settings like motion zones, notification preferences, and picture quality to suit your security needs. Dive into features like night vision and motion detection to optimize your security setup.
- Verify Connection: Complete the setup by confirming that the Ring app can stream live video from your cam without interruptions. Adjust any settings if necessary for a great user experience.
Troubleshooting Common Issues
Resolving Common Hiccups
Despite a smooth installation process, your Ring Floodlight Cam might encounter a few common issues. Let’s delve into some ways to address and resolve these problems, ensuring your floodlight camera provides optimal security and functionality.
- Connection Issues: If your device isn't connecting to the Ring app, verify that the Wi-Fi network is functioning properly. Ensure the floodlight camera is within range of the router. A simple reboot of the router or the Ring device can sometimes solve connection woes.
- Camera Not Powering On: Double-check the wiring at the junction box. Ensure the hot wire, white wire, and ground wire are securely connected. Inspect the mounting bracket to confirm it's installed correctly. Faulty wiring or a loose connection might be the culprit.
- Motion Detection Concerns: If the camera isn’t picking up motion as expected, adjust the motion zones in the app. Make sure the floodlight cam’s field of view covers all necessary angles where activity is expected.
- Poor Picture Quality: Picture quality issues can often be linked to network strength. Verify the signal strength at the location of the floodlight camera. If the problem persists, consider repositioning the device or upgrading your internet service for better video clarity, especially necessary for night vision.
- App Sync Problems: At times, syncing issues might arise with the Ring app. Make sure the app is updated to its latest version. Reinstalling the app can also address syncing problems if all else fails.
With these troubleshooting tips, you can enhance the functionality of your Ring Floodlight Cam, ensuring it delivers great security performance as expected. Remember, persistent issues might need professional assistance or a detailed inspection from the Ring support team.
