Understanding Your Ring Doorbell
Getting to Know Your Smart Video Doorbell
Before diving into the installation process, it's essential to understand your specific Ring device. Whether you're opting for a Ring Video Doorbell with battery power or a Ring Pro wired doorbell, each model has its nuances. Familiarity with your device can simplify installation and ensure you're ready to handle any potential challenges that may arise.
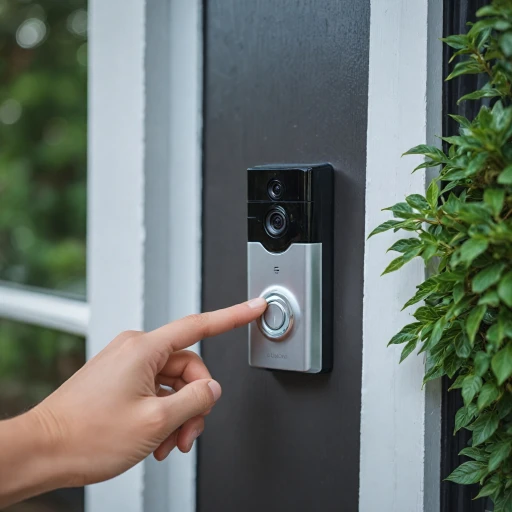
The Ring doorbell is a versatile security gadget that connects to your smartphone via the Ring app, allowing live viewing of your front door area. This video function is a significant step up from traditional doorbells, providing both security and convenience. Essentially, this device can operate as a standalone unit or be integrated with existing doorbell wiring.
Spotting the differences between various generations of Ring doorbells can help determine compatibility with your current setup. For instance, note if your choice requires mounting brackets or if it comes with wall anchors for positioning on surfaces like brick or concrete. Wired models might necessitate an understanding of doorbell wires and ensuring power is turned off before physical installation.
Battery-powered models offer more flexibility if wall drilling isn't feasible. However, they do require occasional recharging to maintain functionality.
Acquaint yourself with the parts included in the box, such as mounting screws, drill bit, and additional pieces tailored for unique walls. Proper preparation and understanding drive a smoother, more effective installation experience, making life with a Ring device harness both safety and peace of mind.
Preparing for Installation
Gather Essential Tools and Materials
Before starting your Ring doorbell installation, ensure you have all necessary tools and materials. This preparation will save time and reduce frustration. Gather a drill, drill bit compatible with your wall type (brick, concrete, etc.), a screwdriver, and wall anchors if you're attaching the doorbell to a brick or concrete surface. Having these tools ready enables a smoother installation process.Decide on Wired or Battery Powered
Determine whether your ring doorbell will use existing doorbell wires or if it will operate as a battery powered device. If you opt for the wired route, locate your home's existing doorbell wires. These will provide continuous power to your Ring device, but remember to turn power off before handling any electrical components.Select the Mounting Location
Locate an optimal spot for your Ring doorbell, keeping in mind both security and convenience. Choose a location at roughly chest height, ensuring a clear view and no obstructions for the video doorbell. If you plan to use an existing chime, place the device within reasonable proximity to its current mounting setup.Ensure Wall Compatibility
Depending on your wall type, you may need specific tools to install the mounting bracket. Use the appropriate drill bit to create holes for screws, with consideration for materials such as brick or concrete. Wall anchors might be necessary for more secure installation on these surfaces.Download the Ring App
Prepare your smartphone by downloading the Ring app, which will guide you through the installation and initial configuration. This app is crucial not only for setup but for ongoing management of your Ring doorbell. After these preparatory steps, you're ready to proceed with installing your Ring video doorbell.Step-by-Step Installation Guide
Gathering the Tools and Equipment You'll Need
Before starting the installation process, it's crucial to gather all the necessary tools and equipment. For a successful Ring Video Doorbell installation, you'll typically need the following:- A power drill with the appropriate drill bits
- Screws and wall anchors, especially if you're installing on brick or concrete surfaces
- A screwdriver
- A level to ensure precise positioning
- The mounting bracket provided with your Ring doorbell
- A battery if it's a battery-powered device
- Wire extensions if your existing doorbell wires are too short
Prepping Your Installation Spot
To maintain the integrity of your home's exterior, carefully select the installation spot for your device. If replacing an existing wired doorbell, ensure the area is free from obstructions and can accommodate the new hardware. Confirm power to the existing doorbell is turned off before proceeding. Using a level, mark where you'll drill holes for the screws and mounting bracket.Attaching the Mounting Bracket
Secure the mounting bracket to the wall, guided by the markings made during prep. If mounting on brick or concrete, drill pilot holes using a masonry drill bit, and insert wall anchors. For surfaces like wood or vinyl, wall anchors may not be necessary. Once the anchors are in place, use screws to attach the bracket securely.Installing the Ring Doorbell
Whether your Ring device is wired or battery powered affects this step. For a wired doorbell, connect the provided wires from the Ring to the existing doorbell wires. If using a battery powered model, ensure the battery is fully charged before locking it into place. Align the Ring Video Doorbell with the mounting bracket and secure it with the included screws.Connecting with the Ring App
Once the physical installation is complete, the final step is setting up your device in the Ring app. Download the app if you haven't already, and follow the in-app instructions to connect your new video doorbell to your Wi-Fi network and complete the setup process. This app integration is essential for monitoring and controlling your Ring device, enhancing both security and user convenience. For more comprehensive details about the costs associated with owning a Ring device, consider reviewing this instructive guide.Troubleshooting Common Issues
Resolving Common Installation Issues
Successfully setting up your Ring doorbell requires careful attention to detail. However, sometimes, even after following the instructions, you might encounter a few challenges. Here are some typical issues and possible solutions to help you navigate any installation hurdles.
Troubleshooting Power Issues
Whether you are installing a wired doorbell or a battery powered device, power issues can arise. If your doorbell does not power on, ensure you’ve turned the power back on from the circuit breaker. For ring wired doorbells, double-check that the wires are connected properly. In case of a battery powered installation, make sure the battery is charged. If your existing doorbell was functioning properly, confirm that the doorbell wires were securely attached to your new ring device.
Video Quality Concerns
Encountering issues with the video connection might require you to tweak a few settings in the ring app. Ensure your Wi-Fi network is stable and that the video doorbell is within range of your router. You may need to adjust the orientation of the mounting bracket to improve the field of view.
Chime and Notification Issues
If your chime or notifications don't work as expected, verify the settings in the ring app. For wired doorbells, confirm that all the wires are correctly installed and not loose. Revisit the app settings to ensure alerts are enabled, allowing your video doorbell to send timely notifications.
Mounting Challenges
Sometimes, the installation surface, such as brick concrete walls, can present difficulties. Use suitable drill bits to create drill holes for wall anchors or screws. Ensure that your mounting bracket is securely attached to the wall to prevent any potential dislodging of the ring doorbell.
By addressing these common problems during the installation process, you can ensure a seamless setup, making the most of your ring video doorbells. Remember, keeping your ring app updated and your device well-maintained enhances the security and efficiency of your smart home environment.
Enhancing Security with Your Ring Doorbell
Boosting the Security of Your Home Using Your Device
To maximize the security features of your Ring doorbell, it's crucial not only to properly install and maintain the device, but also to effectively use its capabilities once installed. The Ring video doorbell offers multifaceted protection and peace of mind, with features designed to improve overall home security.- Customize Motion Settings: Begin by adjusting the motion detection features through the Ring app. Fine-tune the sensitivity levels and set specific motion zones to prevent false alerts triggered by passing cars or pedestrians.
- Utilize Two-Way Audio: The Ring doorbell comes with two-way audio, allowing you to communicate directly with visitors through the app, even if you're miles away. This feature can deter potential intruders and allows you to safely interact with those at your door without having to physically open it.
- Real-time Video Monitoring: Use the live video feed to keep an eye on your property at any time. Whether you're at home or on vacation, access your video doorbell feed to ensure your home is secure.
- Consider Professional Monitoring: For an additional layer of security, explore Ring’s professional monitoring services. This feature can offer emergency services dispatch when unusual activity is detected.
- Integrate with Existing Systems: If you already have a security system, check if it’s compatible with your Ring device. Integrating systems can offer comprehensive security management through a single platform.


