Understanding Smart Doorbell Components
Key Elements of Your Smart Doorbell System
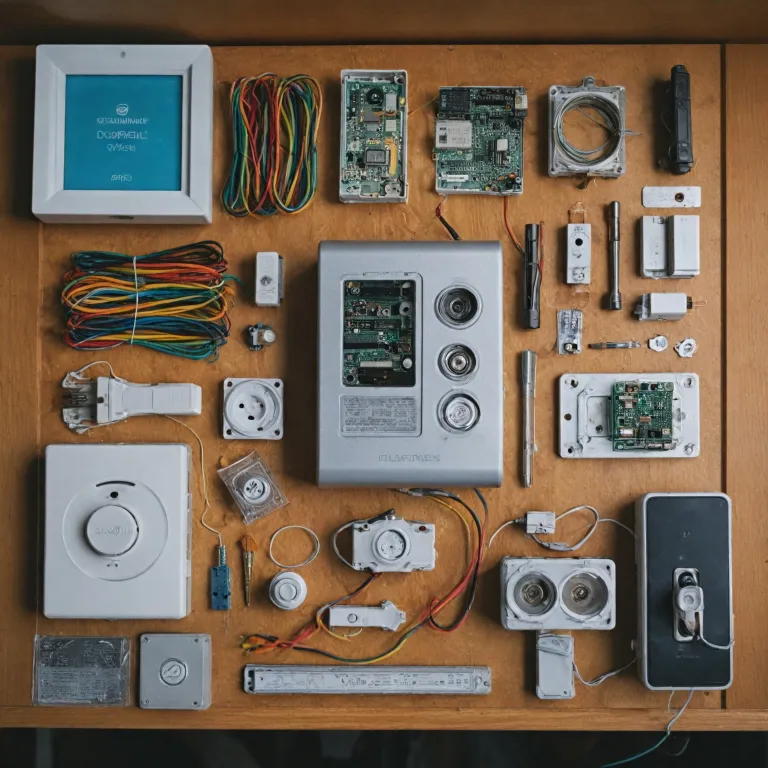
Embarking on the journey to install a smart doorbell requires an understanding of its primary components. Familiarity with these elements not only ensures a smoother installation process but also enhances your security setup's efficiency. Let's break down the crucial parts.
- Wired Doorbell: This is the main component that facilitates communication between you and whoever is at your door. Modern video doorbells, like the ring or nest doorbell, incorporate features that allow video streaming to your devices, adding an extra layer of security.
- Doorbell Chime: Typically located inside the house, the chime notifies you when someone presses the doorbell. Understanding how to effectively mount and connect the chime is essential for a functional wired doorbell.
- Transformer: The doorbell transformer converts your home's electrical voltage to a lower voltage required by the doorbell system. Ensuring your transformer is compatible and properly wired is crucial for the efficient functioning of your setup.
- Power Source and Wires: Connect wires manually to your smart doorbell, chime, and transformer. This requires ensuring the power source is adequate, typically checked via the circuit breaker, before installation.
- Mounting and Installation Hardware: Certain doorbells, such as google nest, require specific hardware for proper mounting on the wall. You'll also need tools to create mounting holes and use wedges if you'd like to adjust the viewing angle.
Having a solid grasp of these components paves the way for the practical steps discussed later, such as wire connected techniques, and mounting options. Remember, correctly executing these initial steps ensures a seamless and effective installation of your smart doorbell system.
Gathering the Necessary Tools and Materials
Essential Tools and Materials for Installing Your Smart Doorbell
To ensure a smooth installation of your smart doorbell, being well-prepared with the right tools and materials is crucial. Here's a list of what you'll need:- Screwdriver and Drill: A screwdriver is vital for securing your doorbell and mounting bracket. You'll also need a drill to create mounting holes on your wall.
- Wire Strippers: To properly manage and connect wires, a wire stripper will be necessary for preparing the ends of your wires for connection.
- Voltage Tester: A non-contact voltage tester helps ensure that the power is off before proceeding with the wiring installation, maintaining safety first.
- Wire Connectors: These are essential to safely join wires together, preventing any electrical hazards.
- Transformer (if required): Some smart doorbells need a compatible doorbell transformer to function correctly. Verify if your doorbell requires a transformer that matches its power specifications.
- Mounting Bracket and Screws: Most smart doorbells come with their own mounting brackets and screws, but it's beneficial to double-check that you have these components ready.
- Drill Bit: This is for wall installations, ensuring you can create holes for screws without any trouble.
- Level Tool: Keeping your doorbell level is essential for its aesthetic appeal and functional orientation, especially for video doorbells.
Safety Precautions Before You Begin
Prioritize Safety Before You Start
Ensuring safety is paramount when dealing with electrical installations, such as setting up your new wired doorbell system. Before jumping into the wiring process, there are key steps to follow to safeguard both yourself and your home.- Turn Off the Power: The first and foremost step is to turn off the power to the existing doorbell at the circuit breaker. This ensures that there is no live current running through the wires you'll be handling. An inactive power circuit minimizes the risk of electric shock when dealing with the doorbell transformer and other components.
- Check for Power: Once the breaker is off, use a voltage tester to ensure there's no electricity flowing to the doorbell chime, transformer, or any wiring. This double-check reduces the chance of error and confirms a safe work environment.
- Organize Your Space: Before installing the video doorbell, clear the area around your work location. Ensure the wall surface is clean and dry, and have your tools and materials, such as wire connectors, mounting screws, and the doorbell chime, easily accessible.
- Safety Gear: When working with electrical components, wearing rubber-soled shoes and using insulated tools can provide additional protection against electrical hazards. Safety goggles are also recommended to protect your eyes from debris or accidental wire splashes.
- Understand Your Setup: Familiarize yourself with the different components involved in your specific doorbell system. Whether you're dealing with a Google Nest doorbell or another model, identifying the transformer, chime, and wiring locations will aid in a smoother installation. Reference guides or detailed instructions, like exploring installing your SimpliSafe doorbell with ease, can provide valuable insights.
Step-by-Step Wiring Instructions
Begin the Installation Process
Once you've gathered all necessary tools and ensured safety measures are in place, it's time to begin installing your smart doorbell. This process will provide power to your video doorbell and ensure it functions correctly with the existing chime and transformer setup.
Disconnect Power Supply
Before handling any wires, ensure you turn off the power at the circuit breaker. Safety is a top priority when dealing with electrical wiring. Confirm that the power is off by testing the wires with a voltage tester before proceeding.
Remove Existing Doorbell
Carefully remove your current doorbell from the wall. You'll find the mounting holes and wires underneath. Label the wires connected to the existing doorbell to avoid confusion later. Typically, you'll see two to three wires.
Connect Your Smart Doorbell Wires
Typically, the doorbell will come with specific instructions for connecting the wires. Generally, you will connect the two wires from your wall to the terminals on the smart doorbell. Ensure that the wires are securely fastened and avoid frayed ends.
Installing the Doorbell
After securing the wires, it's time to decide on the ideal position for your smart doorbell. Adjust accordingly if your setup requires a wedge for a corner mount. Ensure that your doorbell is securely placed and that the video doorbell has a clear view of your intended area.
Reconnect Power
Once your smart doorbell is mounted and wires are firmly connected, you can turn power back on at the circuit breaker. Check if the device powers on and if the doorbell chime functions correctly.
Testing the Setup
After installation, ensure everything is operating smoothly: your doorbell chime should ring when the smart doorbell is pressed, and the video feeds should be accessible from the app associated with your device, such as Nest or Ring.
Troubleshooting Common Wiring Issues
Overcoming Wiring Challenges
Dealing with wiring issues while installing your smart doorbell can be a daunting task. However, addressing common problems effectively ensures your doorbell functions optimally.- Power Supply Problems: Ensure your doorbell transformer is properly connected and supplying the required voltage. If your doorbell or chime is not getting power, check the wiring from the transformer to the wall. Confirm the circuit breaker isn't tripped and the wires are intact.
- Loose Connections: A loose wire can disrupt power flow. Re-secure any loose wires connected to the chime or transformer. Inspect both the mounting area and around the chime wiring, gently tugging to ensure all connections are strong.
- Mismatched Components: Verify compatibility between your doorbell, transformer, and chime. Certain models, like Google's Nest Doorbell, may require specific transformers or chimes to function correctly.
- Video Signal Issues: If your video doorbell is wired but experiencing connectivity or quality issues, ensure that the plug providing power is secure. Additionally, check that all components, including any mounting wedges or corners, are properly aligned.
- Chime Malfunctions: If the chime doesn't ring, ensure it is properly wired and that there's no disruption in the connected circuit. This can often be caused by misaligned mounting holes or faults in the existing doorbell wiring.
Enhancing Your Smart Doorbell Setup
Optimizing Your Smart Doorbell Experience
Enhancing your smart doorbell setup after wiring is crucial for maximizing its functionality and security. Here are some tips and considerations for improving your system:- Power Considerations: Ensure your doorbell transformer is suitable for the power requirements of your new smart device. If upgrading from a traditional doorbell, confirm that the transformer can handle a video doorbell drawing more power.
- Position Your Chime Correctly: Proper placement of your doorbell chime can affect sound projection throughout your home. Test different locations to find the optimal spot, keeping wiring and the doorbell gen design in mind.
- Check the Wiring: Verify that the wiring is secure. Loose wires can cause intermittent power loss or a weak connection, impacting performance. Ensure wires are properly connected to both the chime and the doorbell transformer.
- Secure Your Setup: Make sure the doorbell wired assembly is firmly mounted on the wall using appropriate screws and mounting holes. This ensures the device stays in place throughout use, maintaining alignment for the video feed.
- Use a Wedge for Angling: If your doorbell's view is obstructed or needs adjustment, utilize a wedge corner or angled mount to improve visibility. This will provide a better field of view for the security camera.
- Confirm Circuit Breaker Settings: Prior to turning on the power, ensure circuit breakers connected to your doorbell wiring are set correctly. Properly reset any breakers tripped during installation.
- Connectivity Checks: Verify that your device is connected to your home network and paired with your security system. This ensures remote access and live video streaming capabilities are functioning.
- Consider Additional Integrations: Some systems, like a Nest doorbell or Google Nest, offer advanced features such as facial recognition or smart home integration. Check for software updates that might enhance your existing doorbell setup with new capabilities.