Understanding Your Ring Doorbell Generation 2
When it comes to understanding your Ring Doorbell Generation 2, there are a few crucial elements to recognize, especially if you are considering removing the faceplate for any reason. The Ring Doorbell Gen 2 is a popular choice among customers due to its impressive features such as video recording and real-time alerts, which enhance your home's security at the front door.
Key Features of Ring Doorbell Gen 2
- Battery Powered: This video doorbell operates on a rechargeable battery, allowing for flexibility in placement on any wall without the need for complex wiring.
- Interchangeable Faceplates: The faceplate is available in different colors, letting you choose the one that best complements your home's exterior. This customizable feature also means you might want to remove or change the faceplate for various reasons.
- Security Enhancements: With the use of the provided screwdriver, you can securely attach the faceplate with a security screw at the bottom, preventing unauthorized removal.
- Compatibility with Amazon Alexa: Integrates seamlessly with smart home devices, offering a comprehensive security solution when paired with other Ring products.
Understanding the Importance of Faceplate Removal
At some point, you may need to remove the faceplate from your Ring Doorbell Gen 2. This step is essential for a variety of maintenance activities, including battery replacement or when troubleshooting common issues such as connectivity problems or sensor faults. It's important to carefully follow the correct procedures and safety precautions, which I will detail in later sections, for smooth operation and to avoid damage.
In addition, consider viewing instructional videos for practical demonstrations, especially if you're new to handling such devices. This helps to ensure that you can maintain your doorbell pro efficiently after removing the faceplate, and keep your video doorbell in excellent working condition over time.
Tools You Will Need
Necessary Tools for a Seamless Process
To successfully remove the faceplate from your Ring Doorbell Generation 2, it's essential to have the right tools on hand. Equipping yourself properly ensures a smoother removal process, prevents damage, and saves time. Before diving into this task, collect the following items:- Provided screwdriver: When you purchased your Ring Doorbell, it should have come with a specially designed screwdriver. This tool usually features a unique star-shaped head, perfectly suited for removing the security screw found at the bottom of your video doorbell's faceplate.
- Standard Phillips-head screwdriver: In case you have misplaced the provided screwdriver, a standard Phillips-head can serve as an alternative, although it's not always guaranteed to fit as seamlessly.
- Soft cloth or cushioning: As you work on your Ring doorbell, keep a soft cloth or piece of cushioning adjacent to prevent scratches or damage as you remove the faceplate.
Safety Precautions Before Removal
Before You Start: Safeguarding Steps
Ensuring your safety and the functionality of your Ring Doorbell Generation 2 before attempting to remove the faceplate is crucial. Here’s a checklist of safety precautions to consider:- Power Off First: Prioritize safety by switching off the power source if you are dealing with a hardwired Ring Video Doorbell Pro, to avoid any electrical mishaps. For battery-powered models, remove the battery before proceeding with any disassembly.
- Gather the Right Tools: Avoid damaging your device by using the appropriate tools like the provided screwdriver. If you've misplaced it, customers have shared that a similar star head screwdriver can be purchased on Amazon.
- Check for Security Features: Some devices may come with a security screw at the bottom to prevent unauthorized removal of the faceplate. Be prepared to carefully remove this screw before attempting to slide off the faceplate.
- Review Installation Guidelines: To prepare for reinstallation, be sure to familiarize yourself with the wall mounting and doorbell cover setup. Reviewing the color guidelines and faceplate design can prevent issues when you replace the cover after maintenance.
- Watch Instructional Videos: If you're a visual learner, watching a reliable tutorial video can provide a visual guide for safely removing the faceplate from your device.
- Be Aware of Your Account Settings: Double-check your Ring account settings and notifications to ensure you don’t miss any important updates related to your security system during the process.
Step-by-step Faceplate Removal Process
Careful Steps to Successfully Remove the Faceplate
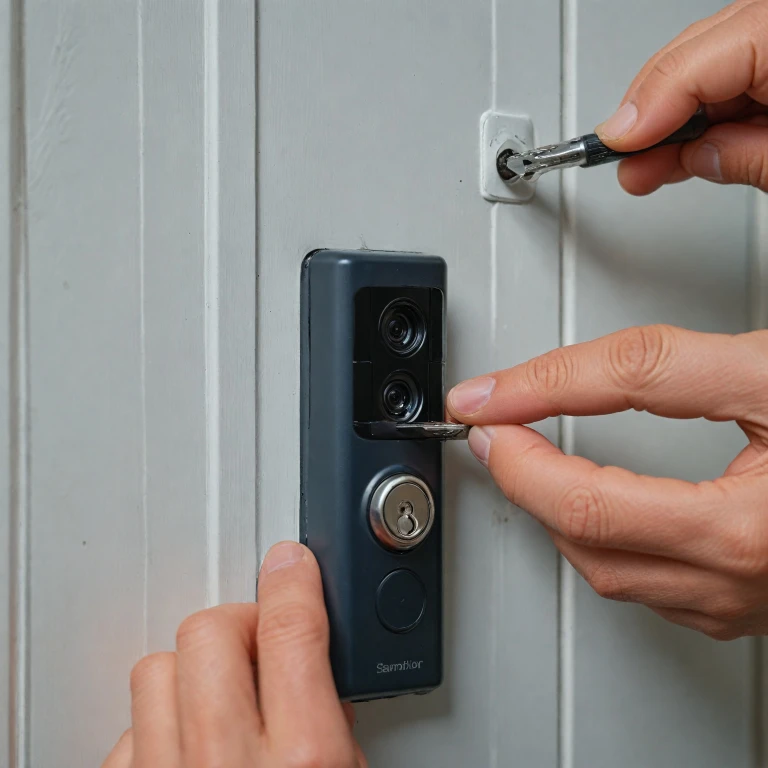
For those ready to undertake the task of removing the faceplate from your Ring Doorbell Generation 2, follow these detailed instructions carefully, ensuring you're in a safe position to handle your device.- Locate the Security Screw: Before you start, find the small star-shaped security screw at the bottom of the doorbell faceplate. This is crucial as it holds the faceplate securely to the wall mounting.
- Gather Your Screwdriver: Use the provided screwdriver that came with your Ring doorbell system. Note that it may feature a star-type pattern, designed to match the shape of the security screw precisely.
- Loosen the Security Screw: Gently insert the screwdriver into the star-shaped slot and turn it counterclockwise. Be cautious not to strip the screw by applying too much force. This will generally allow customers to unlock the cover more seamlessly.
- Remove the Faceplate: Once the screw is loosened, slide the faceplate upwards, away from the bottom faceplate. It should unclip easily from the wall. If there's resistance, double-check that the screw is fully undone.
- Inspect the Faceplate: After removal, inspect the faceplate ring for any damages or battery marks that might compromise its integrity. Such inspections help in maintaining the quality and functionality of your Ring video doorbell system.
- Disconnect the Battery: For battery-powered units, you can now safely access the battery from the unit. This access assists with charging or replacing the battery, which is an essential step in preserving the performance of your device.
Common Issues and Solutions
Troubleshooting Common Faceplate Removal Issues
Removing the faceplate from a Ring Doorbell Gen 2 can sometimes present a few challenges. Fortunately, many of these issues are common and have simple solutions.- Stuck Screw:
- Difficulty Removing Faceplate:
- Battery Concerns:
- Faceplate Color Discrepancies:
- Wall or Weather Impacts:
Maintaining Your Ring Doorbell After Faceplate Removal
Keeping Your Ring Doorbell in Top Condition
After successfully removing and replacing the faceplate of your Ring Doorbell Gen 2, it's essential to maintain its condition for optimal performance. Here are some tips to ensure your device remains in excellent working order:
- Regular Cleaning: Dust and dirt can accumulate on your doorbell, especially around the faceplate and camera. Use a soft, dry cloth to gently wipe the surface. Avoid using harsh chemicals that might damage the finish or affect the camera lens.
- Check the Battery: If your Ring Doorbell is battery-powered, regularly check the battery level through your Ring account. Ensure it is charged to maintain uninterrupted service. A fully charged battery ensures that your doorbell functions optimally, particularly if you rely on it for security purposes.
- Inspect the Mounting: Ensure that the wall mounting and screws are secure. Over time, vibrations from the door or environmental factors might loosen them. Use the provided screwdriver to tighten any loose screws, especially those at the bottom faceplate.
- Update Software: Regularly check for firmware updates through your Ring app. Software updates can enhance performance and security features, ensuring that your video doorbell operates with the latest enhancements.
- Monitor for Issues: Stay vigilant for any common issues such as connectivity problems or video quality degradation. If you notice any issues, refer to troubleshooting guides or contact customer support for assistance.
- Consider Accessories: Depending on your environment, you might want to invest in additional accessories like a reliable ring power adapter, which can provide a constant power source and eliminate the need for frequent battery changes.
By following these maintenance tips, you can ensure that your Ring Doorbell continues to provide security and convenience at your front door, keeping you connected and secure.