Understanding your current wiring setup
Identifying your home's wiring layout
Before you install a smart doorbell or connect new wiring to your light switch, it's important to understand how your current wiring is set up. Most houses have a transformer that steps down the voltage from your main power supply to a level safe for doorbells. This transformer is usually mounted near your electrical panel, in a basement, or sometimes in the attic. The transformer feeds power to the doorbell through wires that run behind your walls.
Tracing the path from switch to doorbell
Start by locating your existing doorbell and light switch. The wires from the transformer typically connect to both the doorbell push button and the chime unit inside your house. In some setups, the light switch and doorbell may share a junction box or be located on the same wall, which can make it easier to install a wired smart doorbell. If you are unsure about your wiring, you can check posts on Reddit for community advice, but always verify information with a licensed electrician.
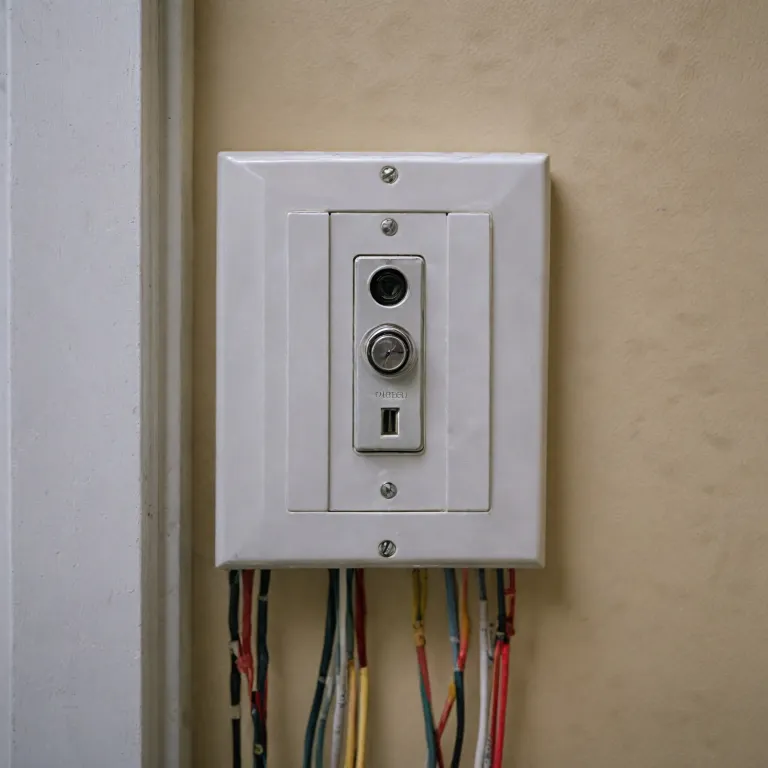
Recognizing wire types and connections
Look for low-voltage wires (usually thinner and sometimes labeled) running from the transformer to the doorbell and chime. The light switch will have standard electrical wires for your house lighting circuit. Understanding which wire feeds power to which device is crucial before you begin installing a smart doorbell or integrating video features. If you plan to add a doorbell light or connect your system to an app, knowing the wiring layout will help you avoid mistakes and ensure a smooth installation.
Helpful resources for mounting and setup
If you need tips on mounting your device, especially for a Blink or Ring doorbell, check out this guide on how to effectively mount your Blink doorbell. Proper mounting is just as important as wiring for a reliable and secure installation.
Essential tools and materials needed
Gathering What You Need for a Smooth Installation
Before you start installing a doorbell using your existing light switch wiring, it’s important to have the right tools and materials on hand. This not only makes the process easier, but also helps prevent mistakes that could affect your doorbell’s performance or even your home’s safety.
- Voltage tester: Essential for confirming that the power is off before you touch any wires in the wall.
- Wire strippers and cutters: These help you safely remove insulation from wires and trim them to the right length.
- Flathead and Phillips screwdrivers: Needed for removing switch plates and securing new connections.
- Electrical tape and wire nuts: For safely joining wires and insulating connections.
- Doorbell transformer: If your house doesn’t already have one, you’ll need a transformer to step down the voltage from your main power supply to a safe level for your wired doorbell.
- Smart doorbell unit: Whether you’re installing a Ring doorbell or another video doorbell, make sure it’s compatible with your wiring setup.
- Extra wire (if needed): Sometimes, the wire from your light switch to the doorbell location isn’t long enough, so having extra wire on hand can save you a trip to the hardware store.
- Drill and mounting hardware: For attaching the doorbell to your wall or door frame.
- Smartphone or tablet: You’ll need this for setting up the doorbell app and testing the video feed after installation.
Some homeowners find it helpful to read guides on replacing a surface-mounted doorbell chime before starting, especially if you’re dealing with older wiring or want to upgrade your chime at the same time.
Having these tools and materials ready will help you move smoothly from identifying your wiring setup to actually installing and powering your new smart doorbell. If you run into issues, many users share troubleshooting tips and posts on forums like Reddit, which can be a valuable resource during installation. Always keep your privacy policy in mind when setting up video features and connecting the doorbell to your app.
Safety precautions before working with electricity
Staying Safe While Handling Electrical Wiring
Working with electricity in your house, especially when modifying wiring for a doorbell or light switch, requires careful attention to safety. Even if you’re just installing a wired ring doorbell or connecting a transformer to feed power to your new device, it’s crucial to take the right precautions.- Turn Off Power at the Breaker: Before you touch any wire, locate your home’s breaker panel and switch off the circuit that controls the light switch or doorbell you’ll be working on. Don’t rely on just flipping the switch off at the wall.
- Test for Live Wires: Use a voltage tester to double-check that no current is flowing to the wires. This step is essential, as sometimes circuits are mislabeled or cross-fed from another source.
- Wear Protective Gear: Insulated gloves and safety glasses can help protect you from accidental shocks or debris when removing the wall plate or working inside the switch box.
- Work in a Dry Environment: Water and electricity are a dangerous mix. Make sure your hands are dry and the area around the switch or doorbell is free from moisture.
- Keep Tools Organized: Only use tools with insulated handles. Lay out your screwdriver, wire stripper, and tester before you start, so you’re not searching for them mid-project.
- Understand Your House Wiring: If you’re unsure about any wire or connection, stop and consult a professional. Posts on forums like Reddit can be helpful, but nothing replaces expert advice when your safety is at stake.
Why These Steps Matter for Your Smart Doorbell
Taking these precautions not only protects you but also ensures your new ring doorbell or video doorbell light will work reliably. Incorrect wiring can damage your transformer, cause your app to lose connection, or even create a fire risk. When you install a doorbell or connect it to a light switch, you’re dealing with the same power that feeds other parts of your house, so every step counts. If you’re considering integrating your doorbell wiring with other smart home devices, it’s worth learning about how to choose the right Z-Wave garage door opener for your smart home for a seamless experience. Remember, following these safety tips will help you avoid common mistakes and make your installation process much smoother.Step-by-step guide to connecting doorbell wiring to a light switch
Preparing the Light Switch and Doorbell Wires
Before you start, make sure you’ve turned off the power at the circuit breaker. Double-check with a voltage tester to confirm there’s no electricity flowing to the light switch or doorbell wires. This step is crucial for your safety and is covered in detail earlier in the guide.
Identifying the Correct Wires
Remove the wall plate from your light switch. Inside, you’ll typically find a bundle of wires: a line (live) wire, a neutral wire, and a ground wire. If your house is older, the wiring colors may differ, so take a photo for reference. Look for the wire that feeds power from the transformer, as this will be key for your doorbell installation.
Connecting the Doorbell to the Light Switch
- Locate the transformer wire that powers your existing light switch. This wire will also feed your new doorbell circuit.
- Run a new wire from the switch box to the location where you want to install the doorbell button. Use a low-voltage wire rated for doorbell systems.
- Connect one end of the new wire to the transformer terminal in the switch box. The other end will connect to the doorbell push button outside your door.
- From the doorbell button, run another wire back to the chime or directly to your smart doorbell device, depending on your setup.
- Secure all connections with wire nuts and electrical tape. Double-check that no bare wire is exposed.
Mounting and Testing the System
Mount the doorbell button securely to the wall near your door. If you’re installing a video doorbell, follow the manufacturer’s instructions for mounting and connecting to your app. Restore power at the breaker and test the system by pressing the doorbell button. The chime should ring, and if you’re using a smart doorbell, check that the video feed appears in your app.
Tips for a Clean Install
- Label all wires before disconnecting anything to avoid confusion.
- Use cable clips to keep wires neat along the wall.
- Check the privacy policy of your smart doorbell app to understand how your video and data are managed.
- For more advice, many users share their experiences on Reddit and other forums, which can be helpful if you run into unique challenges during installation.
Common challenges and troubleshooting tips
Frequent Wiring Issues and How to Spot Them
When connecting your doorbell wiring to a light switch, you might encounter a few common problems. One frequent issue is a weak or inconsistent power feed. If your doorbell or video ring doorbell is not receiving enough power from the transformer, it may not function correctly or could fail to ring at all. Double-check that the transformer is rated for both the doorbell and the light switch load. If the doorbell light flickers or the app shows low voltage warnings, this is a sign to revisit your wiring connections.
Switch and Doorbell Not Working Together
Sometimes, after you install the wiring, the light switch and doorbell may not operate independently. For example, flipping the switch might cut power to the doorbell or vice versa. This usually happens if the wires are not separated properly in the wall box. Ensure that the switch and doorbell each have their own dedicated wire from the transformer. If you’re unsure, reviewing posts on forums like Reddit can provide real-world examples and solutions from people who have faced similar challenges.
Transformer Compatibility and Power Loss
Another challenge is using an incompatible transformer. If your house has an older transformer, it might not supply enough voltage for a modern wired video doorbell. Upgrading the transformer can resolve issues with the doorbell not ringing or the video feed dropping out. Always check the voltage requirements in the product part specifications before installing.
App Connectivity and Privacy Concerns
After wiring, some users find that their doorbell app does not connect reliably, or the video feed is delayed. This can be due to weak Wi-Fi signals near the doorbell or interference from the switch wiring. Moving your router closer or using a Wi-Fi extender can help. Also, review the privacy policy of your doorbell app to ensure your video and data are handled securely.
Push Button and Chime Not Responding
If pressing the push button does not trigger the chime, check that all connections are secure and that the wires are not loose behind the wall. Sometimes, the chime unit itself may require a reset after installing new wiring. Refer to the manufacturer’s instructions for troubleshooting specific chime issues.
- Check all wire connections for tightness and correct placement.
- Verify transformer voltage matches doorbell requirements.
- Test the switch and doorbell independently after installation.
- Consult your doorbell’s app for diagnostic tools and error messages.
Integrating your new wiring with a smart doorbell system
Connecting Your Doorbell to a Smart System
Once your doorbell wiring is in place and safely connected to the light switch circuit, the next step is integrating your setup with a smart doorbell system. Many homeowners choose popular brands like Ring, which offer video capabilities and remote access through an app. To ensure a smooth installation, it’s important to understand how your existing wiring will feed power to the new device.
Powering the Smart Doorbell
Most smart doorbells require a constant power supply, usually provided by a transformer. If your house wiring runs from the light switch, confirm that the transformer delivers the correct voltage—typically 16-24V AC. This is crucial for both wired and video doorbells. If you’re unsure, check the transformer’s label or consult posts on forums like Reddit for advice from others who have installed similar systems.
Wiring and Installation Tips
- Mount the smart doorbell securely to the wall near your entryway.
- Connect the wires from the switch house circuit to the terminals on the doorbell. Double-check that the wire connections are tight and insulated.
- Install the doorbell light if your model supports it. This helps visitors find the push button at night.
- Download the manufacturer’s app to complete the setup and test the video feed.
Privacy and Security Considerations
Before installing, review the device’s privacy policy to understand how your video and data will be handled. Many smart doorbells offer customizable privacy zones and encrypted video feeds, giving you more control over what is recorded and shared.
What to Expect After Installing
After installation, you’ll be able to receive alerts on your phone when someone rings the bell or when motion is detected. The app allows you to view live video, communicate with visitors, and review recorded footage. If you encounter issues, check the wiring connections and transformer output, or consult troubleshooting posts from the manufacturer’s support site or community forums.