Start with the basics: is the doorbell actually getting power ?
When a homeowner searches for a doorbell chime not working fix, the first step is always power and basic safety. A smart doorbell is just a small computer, and if the power supply is unstable or missing, the chime unit will stay silent even when the video looks fine. Before blaming the doorbell system, you should check every simple part that keeps the doorbell working, and switch off power at the breaker if you need to touch mains wiring or the transformer. Never remove covers or touch exposed conductors unless the circuit is isolated and you are confident in basic electrical safety.
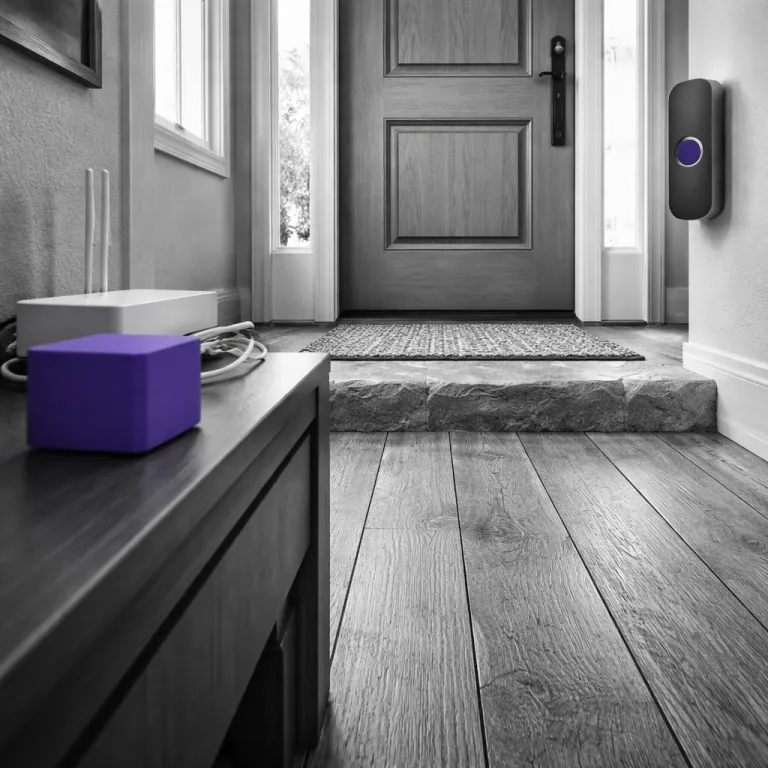
Begin at the doorbell button, because a stuck or cracked button can stop the circuit and make the doorbell chime fail every single time. Press the doorbell button slowly and listen near the indoor chime unit for any faint click or buzz, since that tiny sound often reveals whether the wiring loop is still intact. If the doorbell does not respond at all, remove the button carefully, inspect the wiring for corrosion, and tighten the terminal screws so the system can restore proper contact without exposed copper touching the wall cavity or metal box.
For wired doorbell systems, the doorbell transformer is the quiet hero that keeps everything working safely. A typical transformer for a smart doorbell delivers around 16 to 24 volts AC at 10 to 30 VA, and if that transformer weakens, the video doorbell may still light up while the mechanical chime refuses to move. Use a basic multimeter to check the transformer output, following the manufacturer s safety instructions, and if the reading is low, consider replacing that unit before you blame deeper issues in the doorbell wiring. As a rough guide, a healthy 16 V transformer might show between about 15.5 and 17.5 volts AC at the secondary terminals when measured with no load.
Wireless models introduce different common reasons for silence, because they rely on batteries and radio links instead of copper wiring. Dead batteries in the outdoor unit or in the plug in chime can mimic a wiring fault, so swap in fresh batteries wireless users often forget to change, then test again after a short wait. If the doorbell working status improves briefly and then fails, you likely have a power issue rather than a permanent hardware fault, and a simple battery schedule can prevent repeat failures and confusing intermittent behaviour.
Some hybrid smart security kits combine a wired power supply with a wireless chime, which creates extra points of failure. In these mixed doorbell systems, you must check both the transformer voltage and the wireless pairing, because a problem in either layer can silence the chime. Treat each component as a separate unit during diagnosis, and you will narrow down the reasons doorbell alerts vanish much faster, especially when you note each test result in a simple troubleshooting checklist or log.
Wi Fi and mesh traps: when the chime is online but still silent
Once you know the doorbell has power, the next doorbell chime not working fix usually lives in your Wi Fi settings and mesh configuration. A smart doorbell and its wireless chime rely on a stable 2.4 GHz Wi Fi connection, and modern mesh systems often blend 2.4 and 5 GHz bands under one network name. That auto band blending looks elegant in the app, yet it quietly creates issues where the chime unit pairs one day and then drops off the system the next.
Many wireless chime units need to sit within roughly 1.5 to 3 metres of the router for reliable pairing. If your router hides in a metal cabinet or behind a thick brick wall, the video doorbell might stay online while the indoor chime struggles with every packet. Move the chime closer, angle its antenna away from dense surfaces, then run several test rings over time to see whether the issue stabilises and whether signal strength readings in the app improve.
Mesh routers add another layer of complexity, because they often steer devices between nodes and bands without asking you. A smart doorbell may cling to 2.4 GHz for range, while the chime quietly hops to 5 GHz, and that split can break the private channel some brands use for button chime events. The most reliable fix is to create a dedicated 2.4 GHz SSID for all smart security gear, then reconnect both the doorbell and the chime to that single band so they share the same low frequency network and avoid random roaming.
If your mesh system does not allow a separate SSID, look for an option to disable band steering or smart connect temporarily. During pairing, force both the video doorbell and the chime unit to stay on 2.4 GHz, then re enable advanced features only after you confirm the doorbell working reliably. In stubborn homes with thick walls, a small 2.4 GHz extender placed near the front door can stabilise the power hungry video stream and the more fragile chime traffic without redesigning the whole network.
Night time performance often exposes marginal Wi Fi setups, because interference patterns change when neighbours return home and more devices come online. If you notice that the doorbell doesn t ring the chime after dark but still records video, you are likely seeing a bandwidth or latency problem rather than a wiring fault. For deeper insight into how illumination and connectivity interact, guides on how camera light transforms smart doorbells after dark can help you tune both lighting and network placement for better reliability.
Chime types, jumpers, and diodes: matching hardware the right way
When power and Wi Fi check out, the next doorbell chime not working fix is to match the smart doorbell with the correct chime type. Traditional mechanical chimes use a physical plunger that strikes metal bars, while digital chimes play a recorded sound through a small speaker unit. Wireless chimes sit in their own category, because they do not connect to the doorbell wiring at all and instead listen for a radio signal from the button.
Mechanical chimes often require a small jumper wire or diode when you install doorbell cameras from brands like Ring or Eufy. That jumper bridges two terminals inside the chime unit so the smart system can steal a little power without holding the plunger halfway and causing a constant hum. If the jumper is missing, loose, or installed on the wrong screws, you will see the video feed working while the indoor chime stays completely silent, or you may hear a weak single note instead of the full chime.
Digital chimes behave differently, because they contain a circuit board that expects a clean on off signal from the doorbell button. Some smart doorbell kits include a special digital adapter that plugs into the chime wiring, and skipping that adapter is one of the most common reasons a doorbell doesn t ring indoors. Always check the installation manual for your exact doorbell system, then open the chime cover and confirm whether the correct adapter or diode is present and firmly connected to the labelled terminals. A simple printed wiring diagram inside the cover usually shows which screws handle transformer, front door, and back door connections.
Wireless chimes avoid high voltage wiring but introduce their own pairing rituals and failure modes. If the button chime link breaks, the outdoor unit may still send video to your phone while the indoor speaker remains mute, which makes the issue feel random. Reset both units, clear any old pairings, then follow the manufacturer s pairing sequence step by step, keeping the devices within a couple of metres until the chime confirms a stable link with a test tone or flashing indicator.
Some homeowners eventually decide that replacing the original chime is easier than fighting with legacy hardware. When you replace a chime, label each wire before disconnecting it, then match those labels to the new unit so the transformer, doorbell button, and any second doorbell systems stay correctly mapped. If you are also upgrading lighting or switches near the entry, a guide on how a remote control light switch can refine your smart doorbell experience will help you plan a cleaner, safer layout with fewer confusing wall plates.
Knowing when the chime is dead versus a pairing or wiring fault
At some point in every doorbell chime not working fix process, you must decide whether the chime itself has failed. A smart doorbell can mask a dying chime unit, because the app still shows video, motion alerts, and logs of every time someone presses the button. The trick is to separate the behaviour of the doorbell system into clear tests that isolate power, wiring, and wireless links so you can avoid replacing parts blindly.
Start with a direct power test on wired chimes by using the test procedure recommended by the manufacturer or a qualified electrician instead of improvising. If the chime rings loudly when you trigger it from the transformer side, you have just proved that the wiring from the transformer to the chime is intact and that the mechanical or digital unit is still working. In that case, the issue almost certainly lives at the button, in the smart module, or in a mis wired adapter that interrupts the signal before it reaches the chime.
When a controlled test produces no sound at all, you are likely dealing with a failed chime or a broken power supply. Check the transformer output again, because a transformer that reads zero volts will keep every part of the doorbell systems dark, including the video doorbell if it relies on that same circuit. If the transformer voltage looks healthy yet the chime remains silent, replacing the chime is usually the most efficient path to restore proper operation and avoid chasing hidden wiring faults.
Wireless chimes need a different approach, because you cannot short terminals to simulate a button press. Instead, move the chime to a known good outlet near the router, insert fresh batteries if it uses batteries wireless designs, then perform a full factory reset and re pairing. If the chime still refuses to acknowledge a test ring while the app shows the doorbell working, you can safely treat the chime as a failed unit and request a warranty replacement or a like for like swap.
Smart security buyers sometimes forget that the chime is a separate product with its own warranty terms and failure rates. Before you contact support, document every test you have run, including photos of the wiring, screenshots of the app status, and short clips showing that the video works while the chime stays silent. That evidence not only speeds up warranty approval but also protects your peace of mind when negotiating for a replacement or refund.
When to call support, upgrade hardware, or change your setup
After you exhaust the practical doorbell chime not working fix steps, you face a decision between more tinkering and a cleaner upgrade. A first time smart doorbell buyer often underestimates how much an ageing transformer, brittle wiring, or a budget mesh router can undermine an otherwise solid video doorbell. At some stage, replacing weak links in the system becomes cheaper in both time and frustration than chasing intermittent issues forever.
If your home still runs on a decades old doorbell transformer, upgrading to a modern 16 to 24 volt model with enough amperage can stabilise both the camera and the chime. Pair that with fresh low voltage wiring where accessible, and you remove many common reasons that a doorbell does not ring reliably, especially when the weather turns damp. When you install doorbell upgrades, label every cable, photograph each junction box, and keep a simple diagram so future troubleshooting takes minutes instead of hours.
For homes with chronic Wi Fi dead zones near the front door, a dedicated 2.4 GHz access point or an IoT focused router can be transformative. Placing that unit within a few metres of the smart doorbell and any wireless chimes gives the system a private lane, away from streaming televisions and laptops that compete for bandwidth. If you want an even more resilient setup, resources on how IoT SIM cards keep smart doorbells online and secure explain how cellular backup can maintain alerts when broadband fails.
Support calls go better when you speak the same language as the technician and present clear data. Before you dial, note the exact model of your smart doorbell, the firmware version, the router brand, and the results of each check you performed on the power supply, wiring, and wireless links. Ask the agent to confirm whether your chime type is officially supported, whether any known issues affect your firmware, and what specific tests they need recorded to approve a replacement.
In the end, a reliable doorbell system is less about chasing every exotic fault and more about building a simple, robust chain from button to chime. Stable power, clean wiring, compatible hardware, and a predictable network give you the kind of smart security that genuinely improves daily life. When that chain is solid, every press of the button chime brings the quiet peace of mind that your front door is under control rather than under suspicion.
FAQ
Why does my smart doorbell show video but the chime stays silent ?
This pattern usually means the camera has enough power and Wi Fi, while the chime path is broken somewhere between the doorbell button and the chime unit. On wired setups, start by checking the doorbell transformer voltage, the wiring at the chime, and any jumper or digital adapter required by your model. On wireless systems, focus on dead batteries, weak Wi Fi, or a lost pairing between the doorbell and the indoor chime, then run a short step by step checklist so you do not miss simple fixes.
How can I tell whether my chime is compatible with a new video doorbell ?
Every smart doorbell lists supported chime types, usually mechanical, digital, or wireless, and using an unsupported type is one of the most common reasons doorbell installations fail. Open your existing chime, look for metal bars and plungers for mechanical units or a circuit board and speaker for digital units, then compare that with the manufacturer s compatibility chart. If your chime is not on the list, plan on replacing it or using the brand s own plug in wireless chime, which is often shown in simple wiring diagrams in the manual.
Do I really need a new transformer for my smart doorbell upgrade ?
You only need a new transformer if the existing power supply cannot deliver the voltage and current your video doorbell requires. Many older homes use low output transformers that keep a basic chime working but struggle with the extra load of a camera and Wi Fi radio. A quick multimeter test and a look at the doorbell s specifications will tell you whether a transformer upgrade is a smart long term fix, especially if the label shows less than 16 volts or very low VA.
What should I document before contacting customer support about a silent chime ?
Support teams respond faster when you provide clear evidence of the issue and the steps you have already tried. Take photos of the wiring at the transformer, chime, and doorbell button, record the transformer voltage, and capture screenshots showing the doorbell online while the chime fails to ring. Include dates, times, and any error messages from the app, then share that bundle so the agent can quickly decide whether to offer advanced troubleshooting or a replacement unit.
When is it safer to call an electrician instead of fixing the chime myself ?
You should call a licensed electrician whenever you feel unsure about working near mains voltage or when the doorbell wiring disappears into complex junction boxes. An electrician can safely test the transformer, replace damaged cables, and confirm that the doorbell systems share a proper earth and circuit protection. That professional check is especially valuable in older properties, where undocumented modifications can turn a simple chime issue into a genuine safety risk.