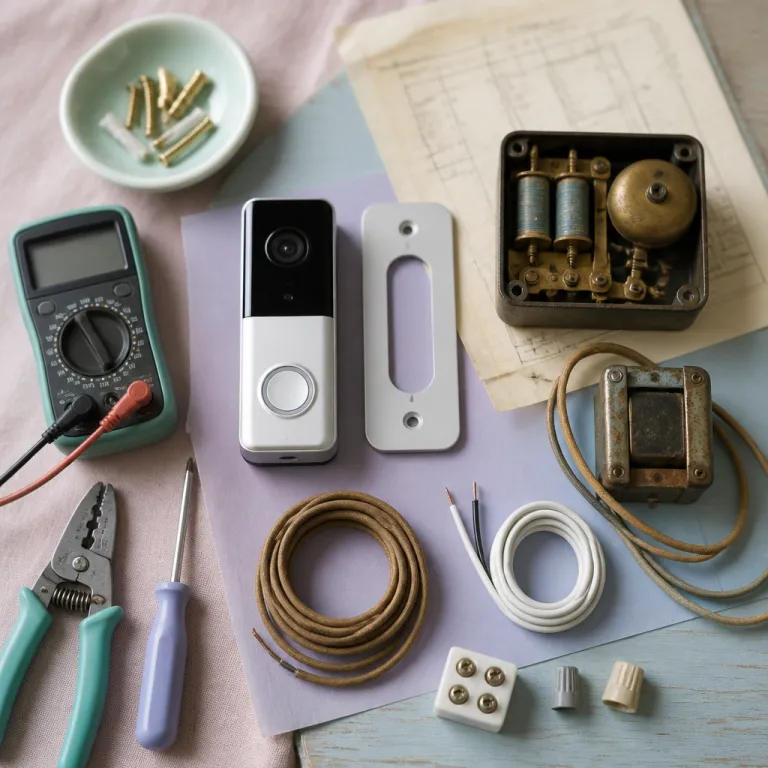
How smart doorbell old house wiring changes your buying decision
Older homes hide quirks that matter when you pick a smart doorbell. A smart video doorbell installed on aging doorbell wiring often has to work with a mechanical chime, thin low voltage conductors, and a transformer buried near a junction box that nobody has opened in decades. If you ignore that wiring reality, the best rated video doorbell can still buzz, hum, reboot, or simply refuse to turn on.
Start by treating your existing doorbell system as a small electrical project, not a quick gadget swap. At the front door, remove the old push button or doorbell button and check whether two or more wires are present, because a wired doorbell usually runs on low voltage from a transformer doorbell circuit hidden near the main panel or furnace. Photograph the wiring, the chime, and the transformer, since those images will help you match a compatible smart doorbell or decide whether a wired wireless hybrid or fully battery powered model makes more sense.
Homes from the 1920s to the 1970s often use doorbell transformers rated at 6 or 8 volts, while most modern smart doorbells expect 16 to 24 volts of stable power. For example, Ring Video Doorbell Pro 2 and Google Nest Doorbell (wired) both specify 16–24 VAC, 10–40 VA in their installation manuals, which is typical across many brands. That mismatch can leave a doorbell camera stuck in an endless boot loop, drain a battery backup faster, or cause the mechanical doorbell chime to buzz instead of ring. When you see a transformer label that looks underpowered in either voltage or VA rating, plan either for a transformer upgrade or for a battery video doorbell that does not rely on existing doorbell wiring at all.
Checking transformer voltage and chime compatibility before you buy
The smartest step is to test your doorbell transformer before you order anything. Turn off the power at the breaker, remove the cover near the transformer doorbell wiring, confirm which terminals feed the front door, then turn the breaker back on so the transformer is energized. Use a multimeter set to AC to measure across the two low voltage screws that feed the front door push button, keeping fingers away from bare metal. If the reading is below about 14 volts, or the VA rating on the label is under 10–16 VA, your current transformer will probably not keep a modern smart doorbell reliably powered.
Mechanical doorbell chimes from mid century homes were designed for short bursts of current, not for a video doorbell that sips power all day to keep a camera and Wi Fi radio awake. When you install a smart doorbell on such a chime, the constant draw can make the chime alarm coil overheat, or it can cause a faint hum every time the doorbell camera wakes to record motion. Brands like Ring include a Pro Power Kit, while others offer a chime bypass module, which you connect across the chime terminals to feed the smart doorbell directly and silence the old doorbell chime.
If you want an audible ring inside, consider pairing a wired doorbell camera with a separate plug in chime or a smart speaker instead of relying on the original doorbell chimes. This approach keeps the delicate mechanical chime safe while giving you flexible placement for alerts at the front and back of the house. For wireless performance details, including how different bands affect range and reliability, guides on wireless frequency bands in smart doorbells explain why some doorbells behave better on certain routers than others. A simple mental wiring diagram helps here: transformer → chime (or bypass) → smart doorbell at the front door, with any plug in chime or speaker connected only over Wi Fi.
[120 V breaker] → [doorbell transformer]
        | 16–24 VAC low voltage output
        ↓
   [chime or bypass module]
        ↓
   [smart doorbell at front door]
Use this simple diagram while you measure transformer voltage with a multimeter so you always know which two low voltage screws you are testing.
When old wiring is a red flag and you should call an electrician
Not every smart doorbell old house wiring situation is safe to tackle as a weekend project. If you open a junction box and see knob and tube wiring feeding the doorbell transformer, stop and bring in a licensed electrician, because modern transformer doorbell hardware is not designed for that insulation and spacing. Trying to wire a smart doorbell into that system can create both fire risk and insurance headaches, and the National Fire Protection Association (NFPA) recommends upgrading obsolete wiring rather than extending it in its electrical safety guidance.
Even in homes with more modern wires, you may find brittle insulation, loose wire nuts, or a transformer bolted to a rusted metal plate near the main panel, and those are all signs that a professional should replace the doorbell transformer while checking the rest of the circuit. An electrician can install a new low voltage transformer with the correct wattage or VA rating, route fresh doorbell wiring to the front door, and confirm that the chime and reset button on any indoor module work as intended. That one visit often costs less than replacing a fried smart doorbell camera and a damaged chime alarm after a miswired attempt.
If your home has no existing doorbells at all, or the wires are too far gone, a battery powered video doorbell becomes the practical choice, because it avoids running new wire through plaster or brick. You still get a smart doorbell with motion alerts and video, but you mount it with screws and rely on a removable battery pack instead of a doorbell transformer. For network reliability and setup clarity, resources that explain what Wi Fi really means for smart doorbells help you position your router or mesh nodes so the camera stays connected.
Wired versus battery models for older homes with tricky doorbell wiring
Choosing between a wired doorbell and a battery powered model in an older home is less about features and more about your existing wiring reality. A wired smart doorbell draws continuous power from the doorbell transformer, supports hardwired chime integration, and usually offers faster wake times for live video, but it depends on healthy low voltage wires and a compatible chime. A battery video doorbell skips the transformer doorbell complexity entirely, at the cost of recharging every few months and often relying on a separate plug in chime or phone notifications.
If your front door already has solid doorbell wiring and a transformer labeled 16 to 24 volts and at least 10–16 VA, a wired smart doorbell is usually the better long term choice, because you avoid worrying about battery swaps during winter or vacations. You connect the two wires to the new doorbell button terminals, attach any chime bypass or Pro Power Kit near the doorbell chime, and let the camera run continuously with stable power. Many homeowners then integrate the doorbell camera into a broader security system, using esphome or similar platforms to automate porch lights when the push button is pressed or when motion is detected.
When the wiring is questionable, or the transformer is buried behind finished walls, a battery model or a wired wireless hybrid that can run on either power source is safer and faster to install. These doorbells mount at the front door with screws or adhesive, use a reset button for pairing, and send video clips to your phone without touching any existing wires. If you also need to mount a smart doorbell through a storm door, glass panel, or screen, detailed mounting workarounds on how to handle storm door and glass installations can prevent vibration and false motion alerts while keeping the camera aligned with visitors.
Pre install checklist for smart doorbells in 1920s to 1970s homes
A structured checklist keeps smart doorbell old house wiring surprises from derailing your weekend. First, map the existing doorbell system by locating the front door button, the indoor chime, and the doorbell transformer, then photograph each part and label which wires go where. Second, test transformer voltage with a multimeter, confirm that the low voltage output and VA rating match your chosen smart doorbell, and note whether the chime is mechanical or digital.
Third, inspect the wiring path between the junction box and the front door for brittle insulation, loose staples, or signs of overheating near the chime alarm, because any of those issues justify calling an electrician before you install a new wired doorbell. Fourth, decide whether you want to keep the existing doorbell chime or replace it with a plug in unit, a smart speaker, or app only alerts, since that choice affects whether you need a chime bypass or a separate accessory. Fifth, choose between wired and battery powered doorbells based on your findings, remembering that a wire doorbell with a healthy transformer offers convenience, while a battery model avoids risky work on aging wires.
Finally, plan your network and security settings before you mount the doorbell camera, including where the Wi Fi signal is strongest near the front door and how you will manage video storage. Some homeowners integrate their video doorbells with esphome or other local platforms to keep more control over footage and automation, while others rely on cloud subscriptions for simplicity. Whatever you choose, treating the doorbell, the chime, the transformer, and the wiring as one connected system will give you a safer install and a more reliable smart doorbell experience.
FAQ
| Question | What to check | Typical readings and actions |
|---|---|---|
How do I know if my old transformer can power a smart doorbell ? |
Turn off the breaker, expose the doorbell transformer, and read the voltage and VA rating on its label. Then, with power restored, set a multimeter to AC and measure across the two low voltage screws that feed the front door, keeping hands clear of bare metal. |
Most smart doorbells need 16 to 24 volts of low voltage AC and at least 10–16 VA. A transformer marked 6 or 8 volts or very low VA, or a live reading below about 14 VAC with no doorbell pressed, is not suitable. In that case, plan for a transformer upgrade or a battery powered video doorbell. |
Can I keep my existing mechanical chime with a new video doorbell ? |
Confirm that the transformer voltage and VA match the manufacturer installation manual for your smart doorbell, and note whether the chime is mechanical or digital. Watch for humming or warmth at the chime after installation. |
Many smart doorbells can trigger an existing mechanical doorbell chime when the transformer falls within spec. If the chime hums, feels hot, or rings weakly, install the included chime bypass or Pro Power Kit, or switch to a plug in chime or smart speaker instead of relying on the original chime alarm. |
Is a battery powered smart doorbell reliable for front door security ? |
Check Wi Fi strength at the mounting spot using a phone, and review the manufacturer estimate for battery life based on motion events and temperature. |
A battery powered smart doorbell is reliable when signal strength is good and you stay on top of charging. Expect occasional downtime during charging and slightly slower wake times compared with fully wired doorbells, but no dependency on existing doorbell wiring. |
What should I do if my home still has knob and tube wiring ? |
Look for ceramic knobs and tubes near the transformer or junction box. If you see them feeding the low voltage transformer or nearby circuits, treat the system as obsolete. |
Do not attempt to install a new wired smart doorbell yourself. NFPA electrical safety recommendations favor replacing knob and tube wiring instead of extending it. Call a licensed electrician to modernize the circuit or choose a battery powered video doorbell that does not connect to existing wires. |
Why does my smart doorbell keep rebooting or buzzing the chime ? |
Measure unloaded transformer voltage with a multimeter set to AC, then press the doorbell and watch for a large voltage drop. Compare both readings with the smart doorbell manufacturer requirements. |
Frequent reboots or a buzzing doorbell chime usually point to low or unstable transformer voltage in an older home. If the voltage sags well below 16 VAC when the doorbell is pressed, you likely need a new transformer, a chime bypass module, or a switch to a battery powered model. Call an electrician if you see damaged insulation, overheated parts, or confusing wiring. |
Sources
Consumer Reports, Wirecutter, National Fire Protection Association electrical safety guidance, manufacturer installation manuals for Ring and Google Nest wired video doorbells